Your First 30 Days: Crypto Exchange Guide 2026
A week-by-week plan from registration to confident crypto user — with step-by-step Binance and OKX walkthroughs.
Introduction
Most people who create a crypto exchange account buy Bitcoin once, watch the price for a week, and then forget about it. Six months later, their account sits dormant with £47 in BTC earning nothing. Is that a bad outcome? Yes — and it is the pattern this guide exists to prevent. Over the next 30 days, you will go from a fresh account to a functioning crypto setup: automated purchases on autopilot, your holdings earning yield, and your savings secured in a wallet that only you control.
We recommend Binance and OKX for beginners because they offer the lowest spot trading fees (0.08-0.10% maker/taker), the widest selection of digital assets and trading pairs (350-600+), built-in DCA automation through their auto-invest features, and earn products — including flexible savings, locked staking, and proof-of-stake delegation — that let you generate passive yield from day one. Both are available to UK users; Binance offers free GBP deposits via Faster Payments, while OKX's GBP funding method can vary (check its deposit screen for any fee). Binance gives you a 20% fee discount through our referral link; OKX offers a mystery box bonus up to $10,000. The differences between them are covered in our Binance vs OKX comparison — but for this guide, either exchange works. Choose one and start.
By day 30, you will have a funded exchange account with two-factor authentication and withdrawal whitelisting enabled, a DCA plan buying Bitcoin and Ethereum automatically every week, earn products generating passive yield on your holdings, and a hardware wallet securing any amount above £1,000. That is the complete beginner setup — and everything after this point builds on it.
This guide is written for UK residents using pounds sterling, with UK-specific details on Faster Payments deposits, FCA registration status, HMRC tax treatment, and FSCS coverage limitations. The exchange features and step-by-step instructions apply globally, but the regulatory and tax context is UK-focused. If you are outside the UK, the mechanics are identical — verify your local tax rules and deposit methods before starting.
Why do these specific 30 days matter more than any other month in your crypto journey? Because the habits formed in the first month almost always persist. Most guides either dump 10,000 words of theory with no execution path or oversimplify the process into "buy Bitcoin on an app". This plan differs in two ways: every step maps to a specific button on Binance or OKX, and every week closes with a concrete deliverable you can verify. By day 30 the question is not "do I understand crypto?" but "is my setup running?" — and the answer is visible in your account, not in a quiz.
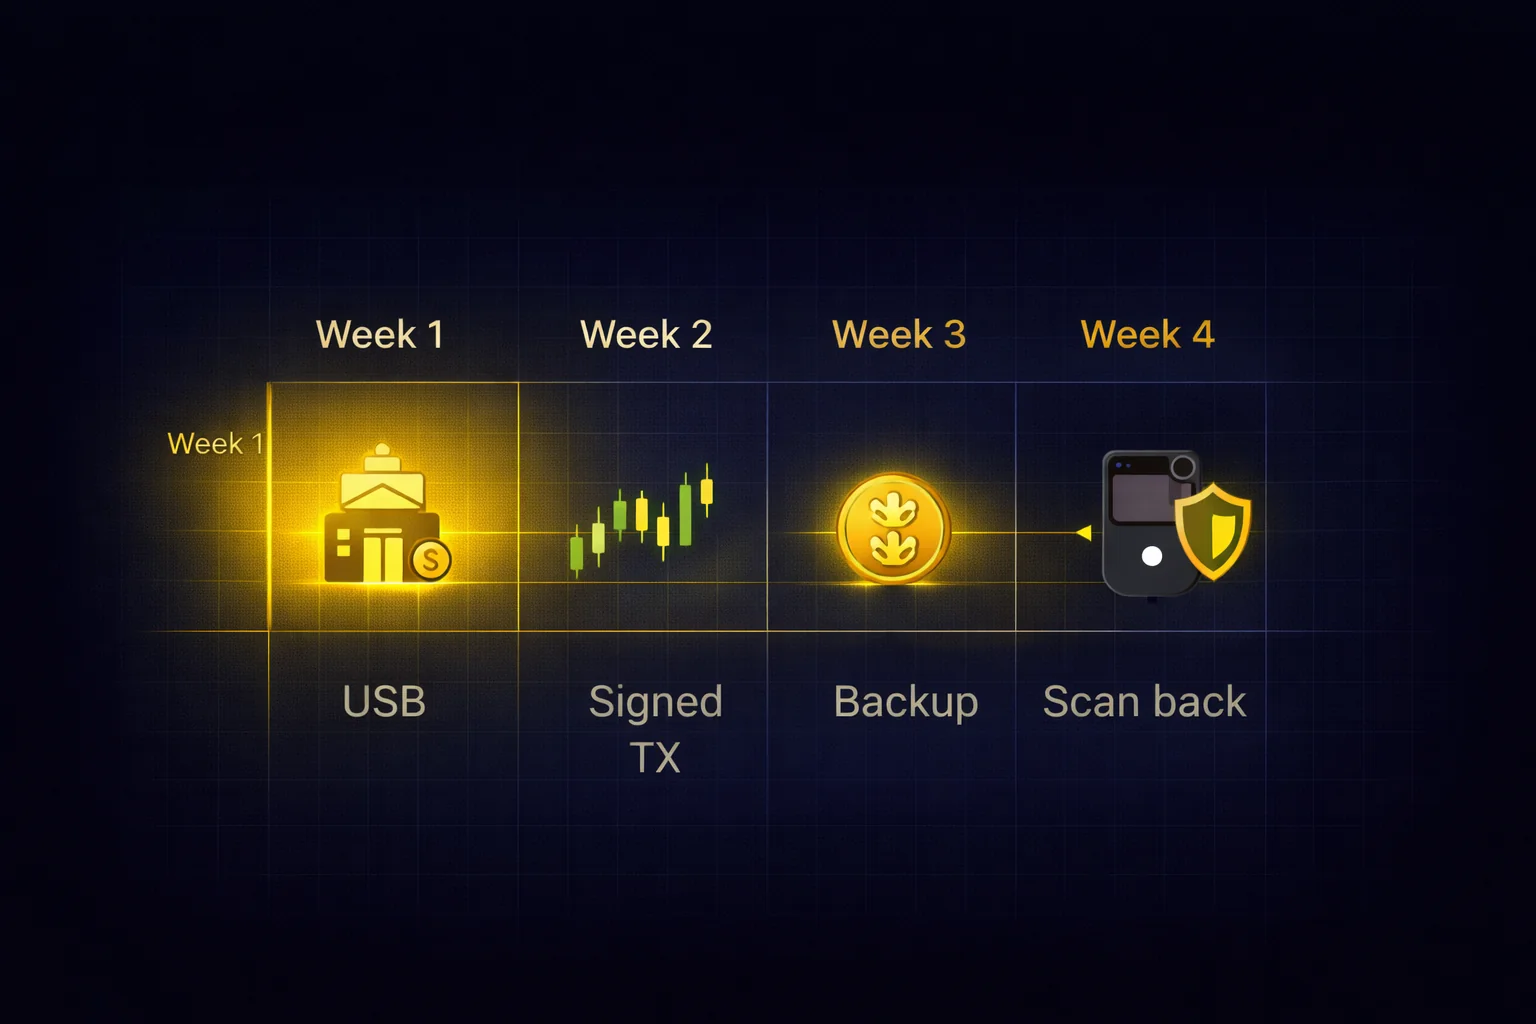
What does a realistic week-by-week plan look like? Week 1 covers foundation: choosing your exchange, completing KYC, configuring two-factor authentication, and making your first GBP deposit via Faster Payments. Week 2 walks you through your first trade step by step and sets up dollar-cost averaging so you never have to time the market. Week 3 puts your idle crypto to work through exchange earn products with realistic APY expectations. Week 4 hardens your security and moves long-term holdings to a hardware wallet for self-custody. Each weekly section ends with a checklist you can tick off before moving on.
Day 0 — Pre-Deposit Security Check
Before you register on any exchange, there is one step that most beginner guides skip: verifying that the exchange you are about to trust with your money is structurally sound. Between 2014 and 2022, exchange collapses (Mt. Gox, QuadrigaCX, FTX) cost investors over $12 billion — and every failure had warning signs visible months in advance.
We built a 5-check security framework covering Proof of Reserves, custody architecture, regulatory licensing, withdrawal controls, and operational signals. Running all five checks takes under an hour using public sources. Once your chosen exchange passes, proceed to Week 1 with confidence.
Week 1 — Foundation Setup
Choose Your Exchange
You do not need to spend days researching exchanges. For a beginner buying Bitcoin and Ethereum with a bank transfer, Binance and OKX both do the job well. What are the practical differences that actually matter at this stage? Binance lists 600+ trading pairs and offers Auto-Invest for automated DCA purchases. OKX has slightly lower maker fees (0.08% vs 0.10%), a built-in Web3 wallet for DeFi access later, and faster KYC verification in most regions. Both support GBP deposits via Faster Payments at no fee.
Should you agonise over the fee difference? No. If you buy £200 a month, your annual fee difference between Binance and OKX is under £1 — irrelevant at this volume. Fees only start to matter when your monthly volume exceeds £5,000, which is far beyond the first-30-days scope. Choose based on interface preference, not fee optimisation.
One important note: do not open accounts on five exchanges simultaneously. Spreading your funds across multiple platforms increases your attack surface (more passwords to manage, more phishing targets) and fragments your portfolio tracking. Start with one exchange. Use it for at least 90 days. If you find a specific feature missing (for example, you want to trade a £50 position in a coin that is not listed), then consider a second exchange as a supplement — not a replacement. Most experienced crypto users settle on one primary exchange and one backup. If you are leaning OKX but want to verify against the closest same-tier alternative before committing, our head-to-head Bybit and OKX breakdown sets out where each one wins.
Complete Verification (KYC)
Every reputable exchange requires identity verification (Know Your Customer, or KYC) before you can deposit fiat currency or withdraw more than a minimal amount. This is a regulatory requirement, not an optional extra. Without completing KYC, your account is limited to small crypto-to-crypto trades — which is not useful if you are starting from scratch with pounds in a bank account.
Prepare these before you start: a valid passport or photo ID, your smartphone for a selfie, and in some cases proof of address (a utility bill or bank statement within the last three months). On Binance, your standard verification will take a few hours to three business days. On OKX, most verifications complete within 24 hours — often under an hour off-peak, so if you submit on Tuesday morning you can usually trade by Wednesday.
Complete KYC on the day you create your account, not the day you want to buy. A pending review means you cannot deposit fiat for days — removing that friction in advance means you can act when opportunities appear.
What are the common KYC issues and how do you avoid them? Use a well-lit room for your selfie (dim lighting causes most rejections). Make sure your ID photo is not obscured by glare or fingers. If you use a passport, photograph the full page including the machine-readable zone. Your proof of address must show your full name and current address — for example, a recent mobile phone bill works, but a screenshot of an online bank statement often does not because it lacks a letterhead. If your verification is rejected, the exchange tells you why — fix the specific issue and resubmit.
After KYC approval, your account limits increase significantly — Binance's verified-tier fiat limits run into the hundreds of thousands of pounds per day (check Profile & Limits for your exact figure), with comparable limits on OKX. Both are far above what any beginner needs. Advanced verification is only needed if your volume reaches institutional levels.
A reasonable concern: what if the exchange freezes your account mid-review? In practice, KYC pending status blocks new deposits and large withdrawals but does not claw back money that has already cleared, and the review rarely takes longer than 72 hours. Complete verification on the day you open the account, not the day you want to buy.
Security Setup — Non-Negotiable
Before you deposit a single pound, configure these three security features on your account. What happens if you skip them? Skipping is the most expensive mistake beginners make — not because of market losses, but because a compromised account means permanent, irreversible theft with no customer support reversal.
Two-factor authentication (2FA) with an authenticator app. Go to Settings, then Security, then Two-Factor Authentication. Choose Google Authenticator or Authy — never SMS. SMS-based 2FA is vulnerable to SIM swap attacks where an attacker convinces your mobile provider to transfer your number to their SIM card, giving them access to every SMS code sent to your phone. Authenticator apps generate codes locally on your device and are immune to this attack. When the setup screen shows a QR code, scan it with the app AND write down the backup key on paper. If you lose your phone without that backup key, you will be locked out of your exchange account for weeks while support manually verifies your identity.
Withdrawal address whitelisting. This feature restricts your withdrawals to addresses you have explicitly pre-approved. If someone gains access to your account (through a phished password, for example), they cannot withdraw to their own wallet because their address is not on your whitelist. On Binance: go to Security, then Withdrawal Whitelist, then enable it and add your own wallet addresses. Any new address you add requires a 24-hour cooling period before it becomes active — that delay is a feature, not a bug.
Anti-phishing code. You set a personal word or phrase that appears in every legitimate email the exchange sends you. If you ever receive an email claiming to be from Binance that does not contain your anti-phishing code, it is a phishing attempt — and you now know instantly. On Binance: Security, then Anti-Phishing Code. On OKX: the equivalent lives under Security Settings. Choose something you will remember but a stranger could not guess from your public information.
These three steps will take you 15 minutes total and will protect you against the three most common attack vectors: credential theft (2FA blocks it), account takeover (whitelist blocks withdrawals), and phishing emails (anti-phishing code reveals fakes). For your holdings above £5,000, consider adding a hardware wallet for transaction signing — our hardware wallet security guide covers the options.
First Deposit
You have three ways to get pounds onto an exchange: bank transfer, debit/credit card, or peer-to-peer (P2P). Bank transfer via Faster Payments is free on Binance and arrives within minutes during banking hours; OKX's GBP funding may route through a third-party provider with a fee, so check its deposit screen. Bank transfer is the method we recommend for any amount above £20. Card deposits are instant but cost around 2% on Binance and roughly 1.99-3% on OKX — for example, a £100 card deposit costs about £2-3 in fees before you have bought anything. P2P trading has no platform fee, but the seller sets their own price which typically includes a 1-3% markup above market rate.
For UK users specifically, free Faster Payments bank transfer on Binance is the clear winner: it arrives in minutes during banking hours with no percentage markup on what you deposit (on OKX, check whether GBP funding carries a third-party fee). Card deposits are convenient but expensive — for example, a £500 card deposit costs about £10 on Binance (2%) and up to ~£15-17.50 on OKX. Over a year of monthly £500 deposits, bank transfer saves roughly £120-210 compared with using a card. Is that worth the extra two minutes it takes to set up a Faster Payments transfer? Every time.
Start with an amount you would not miss if it disappeared tomorrow. For most beginners, £50-100 is enough to learn the mechanics of buying, selling, and transferring crypto without financial stress clouding your decisions. You can always deposit more once you are comfortable with the process. The worst thing you can do is deposit your entire savings on day one, watch the price drop 15% (which happens routinely), and panic-sell at a loss because you invested money you needed for rent.
One UK-specific note you should understand: neither Binance nor OKX is covered by the Financial Services Compensation Scheme (FSCS). Does the £85,000 deposit protection on your bank account extend to your crypto exchange balance? No — it stops the moment the money leaves your current account. The FCA requires crypto firms operating in the UK to register for anti-money-laundering purposes, but that is not the same as full FCA authorisation. Treat every pound on your exchange as at-risk capital from the moment it arrives — which is exactly why Week 4 covers moving your long-term holdings to self-custody.
For a detailed breakdown of every fee type across five major exchanges — trading fees, deposit fees, withdrawal fees, and the hidden costs most guides miss — see our exchange fees guide and our fees comparison.
Week 2 — Your First Trades
Understanding the Interface
The first time you open the spot trading page, it looks overwhelming. Dozens of numbers flickering, a chart with candles you do not understand, and a panel full of buttons. Take a breath. You need exactly three elements for your first trade, and you can ignore everything else for now.
The price chart takes up the largest section of the screen. It shows the price of the asset over time using candlestick bars — green means the price went up during that period, red means it went down. You do not need to understand candlestick patterns yet. For now, glance at the chart to see whether the price has been going up, down, or sideways over the past week. That is all.
The order book sits to the side of the chart. You will see two columns: buy orders (bids) in green and sell orders (asks) in red. The number where your green and red meet is the current market price. You do not need to read the order book for your first trade — it is there for advanced traders placing limit orders. Just note the current price so you know roughly what you are paying.
The order panel is where you actually buy. You will see tabs for different order types (Market, Limit, Stop-Limit) and input fields where you type your amount. For your first purchase, you will use the Market tab — which buys at the current price instantly. That is the only panel you need to interact with right now.
Both Binance and OKX also offer you a simplified "Convert" view that strips away the trading interface entirely. You will see two dropdown menus (from currency and to currency), an amount field, and a single button. If the full trading page feels overwhelming, start with Convert for your first few purchases. The fees are slightly higher (typically 0.1-0.2% embedded in the conversion rate rather than an explicit fee), but the simplicity is worth it while you are learning. You can switch to the Spot trading page once you are comfortable — on a £50 purchase, your price difference is under 10p.
How much should your very first trade be? £50 is the sensible answer — enough that a 0.10% fee (5p) and a 20% drop register as real, but low enough that the loss is educational rather than painful. For example, if you buy £50 of BTC at 63,000 and the price slips to 58,000 within five days, your position is worth £46. Is that a disaster? No — it is the kind of small, survivable lesson that teaches volatility without damaging your finances.
Your First Buy — Step by Step
Open the trading page and search for the pair BTC/USDT (on Binance) or BTC/USDT (on OKX). If you deposited GBP, you may need to convert it to USDT first — on Binance, go to Trade, then Convert, select GBP to USDT, enter your amount, and confirm. On OKX, the process is similar under Trade, then Convert. Once you have USDT in your spot wallet, navigate to Trade, then Spot, and search for BTC/USDT.
Select the Market tab in the order panel. Enter the amount of USDT you want to spend — for example, 50 USDT. The interface will show you approximately how much BTC you will receive at the current price. Click Buy BTC. The order executes immediately, and your BTC appears in your spot wallet within seconds. That is it. You just bought Bitcoin.
What actually happened: you exchanged 50 USDT for approximately 0.00077 BTC (at $65,000 per BTC). The exchange charged a 0.10% trading fee — roughly $0.05 on a $50 trade. Your BTC now sits in your exchange spot wallet. You can hold it, trade it for another asset, transfer it to earn products, or withdraw it to a personal wallet. All of those options are covered in the weeks ahead.
If you deposited GBP and want to buy ETH as well, repeat the same process: Trade, then Spot, search for ETH/USDT, Market tab, enter amount, click Buy ETH. What is a balanced starting portfolio for a beginner? Seventy percent Bitcoin and thirty percent Ethereum is the answer most long-term investors would give you — BTC for your long-term store of value (secured by proof-of-work mining), ETH for your exposure to the smart contract ecosystem and the underlying tokenomics that powers DeFi, NFTs, governance tokens, and Layer 2 networks. You do not need more than two assets in your first month. Resist the urge to buy altcoins you saw on social media — most beginners who chase small-cap tokens in their first week lose money on at least one of them.
Check your portfolio after the purchase: on Binance, go to Wallet, then Overview. On OKX, go to Assets, then My Portfolio. You will see your BTC and ETH balances with their current GBP value. The value will fluctuate — sometimes minute by minute. A 5% daily swing in either direction is routine, not a crisis. If watching the price causes you anxiety, check once a day rather than every hour. Your DCA plan (set up next) removes the need to monitor prices constantly.
Introduction to Order Types
You used a market order for your first buy — instant execution at the current price. Exchanges also offer limit orders (set your own price, lower fees) and stop-limit orders (auto-sell on a defined drawdown). For Week 2 the market order is enough; once you are comfortable, switching to limit orders for routine purchases is the single highest-leverage habit. Our complete order types guide walks through each type with real trading scenarios.
Set Up DCA — Automate Your Strategy
What does dollar-cost averaging (DCA) actually mean for you? It means buying a fixed amount of crypto at regular intervals regardless of the price. Instead of trying to guess the bottom — which even professional traders fail at consistently — you invest £25 or £50 every week and let the maths work in your favour. When the price is high, your £50 buys less BTC. When the price drops, your £50 buys more. Over time, your average purchase price smooths out below what most lump-sum buyers achieve, because DCA forces you to buy more when prices are low.
Both Binance and OKX offer you automated DCA. On Binance, go to Earn, then Auto-Invest. Select BTC (or create a portfolio with 70% BTC and 30% ETH), set your amount per cycle (for example, £25), choose weekly, and activate. On OKX, the equivalent lives under Trade, then Recurring Buy. The setup takes you two minutes. Once activated, the exchange buys automatically every week — you do not need to log in, check prices, or make decisions. This is the single most important habit you can build in your first 30 days.
A practical DCA starting point for you: £25 per week split 70/30 between BTC and ETH. That is £17.50 of your money into Bitcoin and £7.50 into Ethereum every Monday. After one year, you will have invested £1,300 and hold a diversified position that was purchased across 52 different price points. Some weeks you buy high, some weeks you buy low — your average smooths out. Historical backtesting shows that if you had run weekly DCA into Bitcoin over any 3-year period since 2015, you would have been profitable, even including the 2018 and 2022 bear markets. Past performance does not guarantee future results, but the consistency of the pattern across multiple market cycles is the strongest argument for you to choose DCA over any other beginner strategy.
One scenario you will face soon: you deposit £500 on Monday, buy £400 of BTC at 62,000, and by Friday the price has dropped to 56,000. Your position shows -£39 unrealised. Should you sell to cut the loss? Should you panic-buy more? The honest answer: do nothing. Your DCA plan has already scheduled the next £25 purchase for Monday — that is your dip-buy, automated, with no emotional input required. The point of building the DCA habit in Week 2 is that your first red week becomes a non-event.
Our DCA strategy guide includes historical backtesting data showing how £100/week in BTC would have performed over different periods, step-by-step setup for both exchanges, and the common mistakes that derail DCA strategies (the biggest one: stopping your purchases when the market drops, which is precisely when DCA delivers the most value).
Week 3 — Put Your Crypto to Work
Exchange Earn Products
Your cryptocurrency is sitting in a spot wallet doing nothing. Exchange earn products change that by letting you generate yield — interest, staking rewards, or token distributions — without moving your assets off the platform. Which three products actually matter for you as a beginner? Flexible savings (where you can deposit and withdraw any time, with lower yields), locked staking (where you lock for 30-120 days for higher yields), and native staking (where you participate in the proof-of-stake consensus mechanism on networks like Ethereum, with the exchange running validators on your behalf).
On Binance, navigate to Earn, then Simple Earn. Search for the asset you hold — BTC, ETH, or USDT — and choose between Flexible (withdraw any time) or Locked (higher rate, fixed period). On OKX, the equivalent is under Finance, then Earn. The setup is identical: select an asset, choose a term, enter the amount, and subscribe. Your balance starts earning from the next calculation period, usually within 24 hours.
A recommended beginner earn allocation for you: keep your DCA assets (the BTC and ETH you are accumulating weekly) in flexible earn so you can withdraw to a hardware wallet any time. If you hold stablecoins you are not planning to convert soon, locked products for 30 or 60 days offer higher rates — typically 6-8% APY versus 3-5% on flexible. Do not lock for 120 days unless you are certain — a 40% crash during a 120-day lock means you cannot sell until the lock expires.
Should you chase the higher altcoin yields (5-12% APY on SOL, DOT, ADA)? Not yet. For example, an 8% yield on a token that drops 50% leaves you down 42% overall. For your first 30 days, stick to BTC, ETH, and stablecoins in earn products.
One feature worth understanding early: when you stake ETH through Binance or OKX, the exchange runs validator nodes on your behalf. Your ETH is locked in the staking contract, and the exchange takes a commission on the gross rewards before crediting your account (roughly 10% on Binance and 2-5% on OKX as of mid-2026 — check the current rate on the staking screen). Some exchanges offer liquid staking tokens (like WBETH on Binance) that represent your staked position — you can trade or use them in DeFi while your underlying ETH keeps earning rewards.
For a complete breakdown of every earn product type — flexible savings, locked staking, launchpad, dual investment, and the risks each carries — see our exchange earn and staking guide.
Realistic Returns
Exchange earn rates are modest compared to the wild promises you see on social media. Honest numbers as of early 2026: BTC flexible savings pays 0.5-2% APY, ETH staking through exchanges earns 2.5-4% APY, and stablecoin deposits (USDT, USDC) return 3-8% APY depending on the platform and whether you lock for a fixed term. These are real yields generated from lending demand and network staking rewards — not token inflation or unsustainable promotional rates.
In concrete terms: for example, if you put £1,000 in USDT at 5% flexible APY, you earn approximately £50 per year, or about £4 per month. If you put £1,000 in ETH at 3.5% staking APY, you earn £35 per year. These are not life-changing sums. But they are real returns on capital that would otherwise sit idle in your wallet — and they compound. After 12 months of your weekly DCA plus earn products, the yield from your accumulated position starts to become meaningful.
Is it worth bothering with earn products at these modest rates? What is the downside of enabling flexible savings on a spot balance you are not touching? Zero subscription cost, withdrawals in 24 hours, and the yield compounds alongside your weekly deposits. For example, after nine months of £50/week DCA you hold around £1,800 in crypto, and the same rate that earned you 50p in Month 1 is now earning around £6 per month on the full balance. The infrastructure you set up today pays out mostly from Month 7 onward — that is how compounding works.
A more realistic worked example: after four weeks of DCA at £50/week, you hold approximately £200 in crypto. You subscribe £100 of ETH to locked staking at 3.5% APY and £100 of USDT to flexible savings at 5% APY. Monthly yield: ETH earns £0.29, USDT earns £0.42 — total £0.71. That is not exciting. But compound it over a year with continued DCA deposits, and the picture changes. For example, after 12 months of £50/week DCA (£2,600 deposited), your earn products on the full balance generate roughly £8-12 per month — modest, but passive and growing with every deposit.
If a platform advertises "100% APY" or "guaranteed 20% returns" on stablecoins, treat it as a red flag you should walk away from. For example, Celsius offered 8-17% on stablecoins in 2021 and collapsed in 2022, freezing $4.7 billion in customer funds. Their yield was funded by risky lending practices, not sustainable revenue, and customers waited years to recover pennies on the dollar. When earn rates are significantly above what Aave or Compound pay on DeFi (currently 3-6% for stablecoins), the extra return reflects extra risk you are absorbing — usually counterparty risk that is not disclosed clearly to you.
For UK investors like you, earn income is taxable. HMRC treats your staking rewards and interest earned on crypto as miscellaneous income, taxed at your marginal rate (20%, 40%, or 45%). Does your £1,000 Personal Savings Allowance for basic-rate taxpayers apply to crypto yield? No — it does not cover any of it. At the amounts involved in your first month — under £1 in yield — this is irrelevant for your tax reporting purposes. But as your portfolio grows, keep records of every earn payout you receive using Koinly or CoinTracker. Both will integrate with your Binance or OKX account via API and generate HMRC-compatible reports for your Self Assessment.
CEX Earn vs DeFi
Exchange earn products are the right starting point for you because they require zero technical knowledge. You click a button and you start earning. But they come with a trade-off for your wallet: the exchange controls your assets, takes a commission on your staking rewards (around 10% on Binance, 2-5% on OKX; some exchanges such as Coinbase charge up to 25%), and can change rates or freeze your withdrawals at any time. DeFi protocols like Aave and Lido eliminate the intermediary for you — you deposit directly into a smart contract, you earn the full network yield minus a smaller protocol fee (typically 10%), and you maintain custody of your assets through your own wallet.
The practical threshold for you: once you are comfortable managing £1,000+ in crypto and can use a wallet like MetaMask, DeFi yields become worth the extra complexity. Lido pays roughly 2.4-2.6% APR on ETH staking (variable) and takes a 10% protocol fee — similar to low-fee exchange staking once the exchange's cut is applied, so for ETH the main DeFi advantage is keeping custody rather than a higher rate. Aave pays 3-8% variable APY on stablecoin lending, which does beat typical exchange savings rates. But DeFi has its own risks for you — smart contract exploits, gas fees, and no customer support if something goes wrong.
Should you pick one camp or the other? The transition from CEX to DeFi is not binary — you probably will use both once you scale up. You keep a portion on Binance or OKX for your convenient fiat on-ramps, DCA automation, and locked staking products. You move another portion to DeFi for your higher yields on stablecoins (for example, Aave typically pays 3-8% variable on USDC versus 3-5% on exchanges), your liquid staking, and composable strategies where you use staked ETH as collateral. The exchange handles your simplicity; DeFi handles your optimisation.
For now, exchange earn is the right move. When you are ready to explore further, our liquid staking guide covers Lido and Rocket Pool in depth, and our yield optimisation strategies guide covers advanced approaches including leveraged staking and Pendle yield tokenisation.
Week 4 — Security Hardening and Self-Custody
Review Your Security Settings
You configured security in Week 1. Now review it with fresh eyes. Open your exchange security settings and verify each item: is 2FA still active on your authenticator app (check by generating a test code)? Is withdrawal whitelisting enabled with only your own addresses listed? Is the anti-phishing code still set and appearing in every email you receive from the exchange? Have you reviewed recent login history for any unfamiliar devices, IP addresses, or locations?
If you created any API keys during the month (for portfolio tracking tools like CoinGecko or tax software like Koinly), check their permissions. Read-only keys are safe. Keys with trading or withdrawal permissions should be deleted unless actively in use — a leaked API key with withdrawal permission is as dangerous as a leaked password. On Binance: API Management, then review each key. On OKX: Settings, then API, then audit permissions.
This review takes five minutes and should become a monthly habit. The security landscape changes — new phishing campaigns target specific exchanges, and your own habits may have introduced risks (like saving your exchange password in a browser that syncs to the cloud). Set a calendar reminder for the first Sunday of each month. Your five-minute check covers:
- 2FA test — generate a code to confirm your authenticator app still works.
- Whitelist review — verify only your own addresses are listed.
- Login history scan — look for unfamiliar devices, IP addresses, or locations.
- API key audit — delete any keys with trading or withdrawal permissions you no longer use.
- A quick email search for unrecognised exchange communications.
One often overlooked risk: browser extensions. If you installed any crypto-related browser extensions during the month — wallet extensions, price trackers, portfolio viewers — audit them now. Malicious extensions can read your clipboard (replacing wallet addresses you copy), inject content into exchange pages (showing fake deposit addresses), or log keystrokes. Only keep extensions you actively use, from publishers you can verify. When in doubt, remove it.
What does the worst case look like? Phished email password → saved exchange credentials in browser → SMS 2FA bypassed via SIM swap → full drain in 20 minutes. Could the exchange reverse it? No. Could authenticator-app 2FA stop it? Yes. Could withdrawal whitelisting stop it even without 2FA? Yes — any new address sits in a 24-hour cooling period. Two settings, 10 minutes total.
Finally, check your email. Search your inbox for emails from your exchange and verify that every one contains your anti-phishing code. If you find any that do not, they are phishing attempts — do not click any links in them. Mark them as spam and delete. If you clicked a link in a suspicious email at any point during the month, change your exchange password immediately and review your recent login history for unfamiliar sessions.
Withdraw to Self-Custody
Who actually controls the pounds you hold on an exchange? The exchange does, not you. Your Bitcoin and Ethereum sit in the exchange's custodial wallet — a hot wallet or cold storage vault managed by their security team, not yours. If the exchange freezes withdrawals (as Celsius did to $4.7 billion in customer funds in 2022), restricts your region due to regulatory changes, or suffers a smart contract exploit or hot wallet breach, your crypto is inaccessible until they decide otherwise. Self-custody — moving your crypto to a hardware wallet where only you hold the private keys and seed phrase — eliminates this counterparty risk for you entirely. Your assets exist on the blockchain itself, controlled by your cryptographic keys, with no intermediary who can freeze, delay, or confiscate them from you.
What is the practical rule for when to move assets off-exchange? Once your total holdings exceed £1,000, you should move the long-term portion to a hardware wallet. Keep on the exchange only what you are actively trading, staking in earn products, or using for DCA purchases. Everything else goes to your cold storage. For example, a Ledger Nano S Plus costs you £65, and a Tangem 3-card pack costs £105 — trivial insurance for any four-figure portfolio.
Withdrawing for the first time feels nerve-wracking, and it should — your crypto transactions are irreversible. Follow this sequence exactly. First, set up your hardware wallet and generate your receiving address. Second, copy the address and verify it character by character on your device screen (clipboard malware can replace copied addresses). Third, send yourself a small test transaction — for example, £5-10 worth of crypto. Fourth, wait for the test to arrive and confirm on your hardware wallet. Fifth, only then send the full amount. Your test transaction costs a small network fee but eliminates your risk of losing everything to a wrong address.
Which network should you choose when you withdraw? For example, if you send BTC you pay approximately £2-5, if you send ETH you pay £3-10, but if you send USDT on the TRC-20 network you pay under £1 and on Arbitrum under £0.20. For your small transfers under £500, the cheaper network saves you a meaningful percentage of the total. For your large transfers, use the native network (Bitcoin mainnet for BTC, Ethereum mainnet for ETH) for maximum security.
A Week 4 scenario: you hold £800 BTC, £400 ETH, and £300 USDT on Binance. What leaves the exchange first? The £800 BTC — it is the position you are least likely to trade and the one you most want out of counterparty risk. Leave ETH on-exchange while it earns staking yield, and keep the USDT as deposit buffer for next week's DCA.
UK tax note for you: transferring crypto between your own wallets is not a taxable event. Does moving BTC from Binance to your Ledger trigger Capital Gains Tax? No — you still own the same asset, you have just changed where you store it. What are your taxable events then? Selling your crypto for fiat, swapping one crypto for another (BTC to ETH counts as a disposal), and spending your crypto to buy goods or services. Keep records of your withdrawal transactions (date, amount, network fee paid) because the network fee is an allowable cost that reduces your gain when you eventually sell. Koinly and CoinTracker both track your wallet-to-wallet transfers correctly if you connect both your exchange and hardware wallet addresses.
A common question: how do you know your withdrawal went to the right address? After sending your test transaction, check the transaction hash (TX hash) on a block explorer. For example, for Bitcoin paste your TX hash into mempool.space — you will see the sender, recipient, amount, and confirmation status. For Ethereum use etherscan.io; for Solana use solscan.io. Verifying the destination on the block explorer against your hardware wallet address gives you independent confirmation. Worth doing for every withdrawal above £100.
Our hardware wallet security guide compares Ledger, Trezor, Tangem, and Keystone with honest trade-offs for each. If you want the quickest setup with no seed phrase, Tangem takes under five minutes. If you want the widest ecosystem and Bluetooth mobile support, Ledger is the standard choice.
Your 30-Day Checkpoint
After 30 days, take stock. If you followed this guide, you now have:
- A verified exchange account with 2FA, withdrawal whitelisting, and anti-phishing protection enabled.
- A weekly DCA plan buying Bitcoin and Ethereum automatically without your intervention.
- Earn products generating yield on your holdings while you sleep.
- A hardware wallet securing your long-term savings where only you hold the keys.
Is your setup stronger than most people who have been in crypto for years? Yes — and by a wide margin. The majority of crypto holders have no DCA plan (they buy randomly on emotion), earn nothing on their holdings (they let them sit in a spot wallet), and keep everything on an exchange (one hack or freeze away from total loss). You have addressed all three weaknesses in your first month.
What does your realistic portfolio snapshot look like after 30 days with £50/week DCA? Approximately £200 in crypto (four weekly purchases). Of that, you will hold £140 in BTC and £60 in ETH if you used the 70/30 split. Your earn products have generated roughly £0.50-1.00 in yield for you — negligible now, but the infrastructure is in place. If you deposited more than £1,000 total (combining DCA with a lump-sum initial deposit), your hardware wallet holds your core savings while the exchange holds only the actively-earning portion. What is your monthly routine from here forward? Check your DCA is still running (one glance), review your security settings (five minutes on the first Sunday), and move accumulated earn rewards to cold storage once they reach a meaningful amount (quarterly is sufficient).
Where to Go From Here
From here, the path branches based on your interests. If you want to earn higher yields through decentralised protocols, start with our liquid staking strategies guide. If you want to understand advanced yield mechanics like tokenised yield and auto-compounding, our yield optimisation guide is the next step. For securing a larger portfolio with multi-signature wallets or inheritance planning, the hardware wallet security guide referenced earlier also covers advanced configurations.
Conclusion
Is thirty days really enough to go from "I have heard of Bitcoin" to "I have a functioning crypto investment setup"? For you, yes — if you follow the structure. The four-week structure exists because each skill you learn builds on the previous one: you cannot trade without an account, cannot automate without understanding a trade, cannot earn without holdings, and cannot secure without something worth securing. Rushing through all four in a weekend is possible for you but leaves gaps — particularly in the security habits that only form through your repetition.
Three habits separate successful crypto investors from those who lose money and quit:
- Consistency in DCA purchases — especially when markets drop and your instinct says stop buying.
- Discipline in security hygiene — monthly reviews of your 2FA, whitelisting, and API keys, not just the initial setup.
- Patience with your positions — the average Bitcoin holding period for profitable exits is over two years, not two weeks.
None of these require technical expertise or trading skill. They require temperament — and temperament can be developed through the structured practice these 30 days provide.
Track your progress. At the end of each week, write down three numbers: your total portfolio value, your total amount deposited, and the difference between them (your unrealised gain or loss). After 12 weeks, you will have a clear picture of how your investments perform through different market conditions. This tracking habit also prepares you for HMRC tax reporting at the end of the tax year — if you record deposits and disposals as they happen, Self Assessment in January becomes a 30-minute task rather than a weekend-long reconstruction of forgotten transactions.
Your immediate next action depends on where you are right now. If you have not created an exchange account yet, start there — the entire first week takes under an hour of actual work spread across a few days of KYC waiting. If you already have an account but no DCA running, set that up today. If everything from Weeks 1-3 is done, Week 4's self-custody step is the most important upgrade you can make to your security posture.
The crypto market will test your patience within these 30 days. Your price will drop — possibly 10-20% from your first purchase. Your portfolio will show you a red number. Social media will declare crypto dead. Should you panic-sell then? No — this is precisely when the habits you built matter most: your DCA plan buys more at the lower price (improving your average), your earn products continue generating yield for you regardless of price, and your hardware wallet keeps your savings secure regardless of exchange drama. Who are the investors who actually build wealth in crypto? Not the ones who time the bottom — they are the ones who stay consistent through the drops, and you can be one of them.
What does success look like at day 30? It is quiet, not loud. No screenshots of overnight gains, no day-trading dashboards, no frantic Reddit browsing — just a DCA plan that runs itself, a couple of pence in staking rewards, a hardware wallet on your desk, and the confidence that the next dip is a buying opportunity rather than a panic event. The common pitfalls to avoid are equally quiet: stopping DCA when prices fall, leaving funds on-exchange out of inertia, and reusing passwords across services. Skip those three traps and the compounding does the rest.
Once your exchange setup is solid and DCA is running, the next layer is understanding what you are actually buying. For a deeper Bitcoin-specific framework — covering allocation sizing, ETF vs direct ownership, and how the post-halving cycle has evolved — see our Bitcoin Investment Fundamentals hub.
Sources and References
Frequently Asked Questions
- Can I start with less than $50?
- Yes. Both Binance and OKX allow trades as small as $1-10 depending on the pair. The practical minimum depends on deposit method: bank transfers are free but some have a minimum of £10-20, while card deposits work from £15+. Starting with £20-50 is enough to learn the mechanics of buying, selling, and using earn products. Increase your deposits once you are comfortable with the process.
- Is it safe to keep crypto on an exchange?
- For small amounts you are actively trading or earning yield on, exchange custody is acceptable — especially with 2FA and withdrawal whitelisting enabled. For long-term savings above £1,000, move to a hardware wallet. Exchange custody means the exchange controls your private keys. If the exchange is hacked, freezes withdrawals, or goes bankrupt (as FTX did in 2022 with $8 billion in customer funds), your assets are at risk regardless of your personal security settings. Binance maintains a $1 billion SAFU insurance fund for hack events, but this does not cover insolvency. OKX publishes proof-of-reserves reports monthly. Neither provides FSCS-style deposit guarantees that UK banks offer.
- How long does withdrawal to a wallet take?
- Bitcoin withdrawals typically confirm in 10-60 minutes depending on network congestion and the fee you pay. Ethereum withdrawals take 1-5 minutes. Withdrawals on faster networks like Solana or Arbitrum confirm in under 30 seconds. The exchange itself may add a processing delay of a few minutes for security checks, especially for large amounts or new withdrawal addresses.
- What if I make a mistake with my first trade?
- If you buy BTC with a market order and the price drops immediately after, that is not a mistake — it is normal volatility. You can sell the BTC back to USDT at any time, though you will pay the trading fee again (0.10% on Binance/OKX). If you accidentally buy the wrong asset, sell it immediately — the loss is limited to two trading fees (buy + sell) plus any price movement in between. The only irreversible mistake is sending crypto to a wrong wallet address, which is why the test-transaction method in Week 4 exists.
- Should I trade or just hold (HODL)?
- For beginners, holding with DCA is statistically more profitable than active trading. Studies consistently show that 70-80% of retail traders lose money over time, primarily because of emotional decisions and trading fees that compound with frequency. A trader making 10 trades per week at 0.10% fee pays roughly 10% of their capital annually in fees alone — before any losing trades. DCA into BTC and ETH, put your holdings into earn products, and resist the urge to day-trade based on social media posts. Once you have held through at least one full market correction (a 20%+ drop and recovery), you will have the emotional experience needed to decide if active trading suits your temperament. Most people who go through that cycle conclude that DCA and holding is less stressful and more profitable.
- When should I move from exchange earn to DeFi?
- Consider DeFi when three conditions are met: your total crypto holdings exceed £5,000 (gas fees on Ethereum mainnet erode small positions), you are comfortable using MetaMask or a similar wallet for self-custody transactions, and you understand what a smart contract does and the risks of interacting with one. For most beginners, this is 3-6 months after starting — not 30 days. Exchange earn products are the right tool for your first quarter in crypto.
- How much money should I start with?
- Start with an amount where a 30% drop would not disrupt your monthly budget. For most beginners in the UK, that means £50-200 for the first month. The goal of your first 30 days is learning the mechanics of deposits, trades, earn products, and withdrawals — not maximising returns. Once the DCA habit is running and your security setup is verified, scale your deposits gradually based on growing confidence rather than on market sentiment or social media hype.
- Can I follow this guide if I am outside the UK?
- Yes. The exchange mechanics, security configuration, DCA setup, and self-custody steps are identical everywhere Binance and OKX operate. Only the tax and regulatory context changes. Replace HMRC references with your own tax authority's guidance on crypto disposals and staking income, verify whether your country restricts any specific crypto products, and use your local fiat deposit rails (SEPA in the EU, ACH in the US, Osko in Australia) instead of Faster Payments. The four-week structure applies without changes.
- What happens if my KYC is rejected?
- The exchange shows you the specific reason — poor photo lighting, glare on the ID, a document that does not match your proof of address, a selfie that failed liveness detection, or an expired passport. Fix the specific issue identified in the message and resubmit from the same verification page. Most rejections are resolved on the second attempt. If three attempts fail, contact support with a screenshot of the rejection message — a human reviewer can usually identify what the automated checker misread.
- What is the difference between a market order and a limit order?
- A market order executes immediately at the best available price — fast, simple, and ideal for small purchases, but the final fill depends on order book liquidity and may slip a few basis points on thinly traded pairs. A limit order sets a specific target price and waits in the order book until the market reaches it — slower and not guaranteed to fill, but the price is fixed and the maker fee is typically lower. For your first buys and weekly DCA, market orders are the right choice; for larger positions or specific entry targets, limit orders give more control.
Back to Crypto Investing Blog Index
Financial Disclaimer
This content is not financial advice. All information provided is for educational purposes only. Cryptocurrency investments carry significant investment risk, and past performance does not guarantee future results. Always do your own research and consult a qualified financial advisor before making investment decisions.