How to Stake Crypto: Step-by-Step
Master crypto staking with this comprehensive guide. Learn wallet setup, platform selection, security practices, and detailed tutorials for all staking methods in 2025.
Introduction
Cryptocurrency staking has become one of the most reliable ways to generate passive income. It works in the digital asset ecosystem. You can earn rewards whilst contributing to blockchain network security. You also help with decentralisation.
In 2025, staking has evolved significantly. It was once a technical process for blockchain experts. Now it's a user-friendly investment strategy. Anyone with cryptocurrency holdings can participate. You only need basic technical knowledge.
The fundamental concept is simple. You lock up cryptocurrency tokens to support a proof-of-stake blockchain network. You participate in the network's consensus mechanism. This helps validate transactions and secure the network. You maintain decentralisation whilst earning rewards. These rewards are proportional to your stake.
This creates a win-win scenario. Individual investors can generate passive income. At the same time, they contribute to blockchain ecosystem health and security.
Modern staking options have diversified significantly. You can choose direct validator staking. This requires technical expertise and substantial capital. Or you can use user-friendly liquid staking protocols. These allow participation with any amount of cryptocurrency.
Exchange-based staking services have further simplified the process. Beginners can start earning rewards with just a few clicks. However, this often means reduced control. You might also get potentially lower yields.
The staking landscape in 2025 offers unprecedented opportunities. Conservative investors can seek steady returns. Sophisticated users can maximise yields through advanced strategies. Major networks like Ethereum, Solana, Cardano, and Polkadot have matured. Their staking mechanisms provide stable and predictable returns.
Institutional adoption has brought additional legitimacy. Infrastructure improvements have enhanced the staking ecosystem. Professional staking services are now available. Insurance products protect your investment. Regulatory clarity has made staking more attractive to mainstream investors.
Understanding various staking methods is essential. You need to know their risk profiles and implementation requirements. This helps you make informed decisions. These should align with your investment goals, technical comfort level, and risk tolerance.
This comprehensive guide provides everything you need. You'll learn to successfully implement crypto staking strategies. We cover basic concepts and platform selection. You'll get advanced techniques and security best practices. Whether you're a complete beginner or an experienced investor, this step-by-step tutorial will help. You can navigate the complexities with confidence.
We'll cover the essential prerequisites for staking. You'll see comparisons of different staking methods and platforms. We provide detailed setup instructions for various approaches. You'll learn advanced strategies for optimising returns. We show you how to manage risks effectively.
By the end of this guide, you'll have the knowledge and confidence. You can implement a staking strategy that suits your specific needs. This helps you achieve your cryptocurrency investment objectives.
The regulatory environment surrounding cryptocurrency staking has matured significantly in 2025, with more straightforward guidelines in major jurisdictions that provide better consumer protection while enabling innovation. This regulatory clarity has encouraged institutional participation and improved the overall security and reliability of staking platforms.
Tax implications of staking rewards have become more standardised, with most jurisdictions treating staking income as taxable upon receipt. Understanding these tax considerations is crucial for proper planning and compliance, especially for larger staking operations that generate significant income.
The technology underlying staking has also evolved, with improvements in validator software, slashing protection mechanisms, and reward distribution systems making staking safer and more efficient. These technological advances have reduced the technical barriers to entry while improving the overall user experience.

Quick Start Checklist
- Choose your method: Exchange (easiest), tokenised staking (flexible), or native (maximum control)
- Set up wallet: Install and secure your crypto wallet with proper backup
- Select platform: Research fees, security, and track record
- Fund and stake: Transfer crypto and follow platform instructions
- Monitor rewards: Track performance and compound when profitable
Essential safety tips
- Never share your seed phrase or private keys
- Start with small amounts to learn the process
- Use hardware wallets for large amounts
- Verify all addresses before sending transactions
Prerequisites & Preparation
What You Need Before Starting
- Compatible wallet: MetaMask (Ethereum), Phantom (Solana), Keplr (Cosmos), or native wallets
- Cryptocurrency to stake: ETH, SOL, ADA, DOT, ATOM, MATIC, AVAX, or other PoS tokens
- Gas/fee tokens: Small amount of native tokens for transaction fees (0.01-0.1 ETH recommended)
- Basic knowledge: Understanding of private keys, wallet security, and blockchain basics
- Research time: 30-60 minutes to compare platforms, validators, and understand risks
- Backup strategy: Secure storage method for seed phrases and private keys
- Tax preparation: Understanding of local tax implications for staking rewards
Understanding Staking Fundamentals
Before diving into the technical steps, it's crucial to understand what staking actually means:
- Proof of Stake consensus: Your tokens help secure the network by validating transactions
- Economic incentives: You earn rewards for honest participation and face penalties for malicious behaviour
- Network participation: Staking makes you an active participant in blockchain governance and security
- Opportunity cost: Staked tokens are locked and can't be used for other investments during the staking period
Risk Assessment Framework
Evaluate these risks before staking:
| Risk Type | Description | Mitigation Strategy | Severity |
|---|---|---|---|
| Slashing Risk | Validator misbehaviour can result in token penalties | Choose reputable validators with good track records | Medium |
| Liquidity Risk | Tokens locked during unbonding periods | Only stake amounts you won't need short-term | Low-Medium |
| Smart Contract Risk | Bugs in staking protocols can cause losses | Use audited protocols with insurance coverage | Medium |
| Market Risk | Token price volatility affects total returns | Diversify across multiple assets and strategies | High |
| Platform Risk | Exchange or protocol failure | Use multiple platforms and self-custody when possible | Medium-High |
Initial Research Steps
- Understand the network: Learn about lockup periods, slashing risks, and reward mechanisms
- Compare yields: Check current staking rewards across different platforms
- Assess risk tolerance: Decide between convenience (CEX) vs control (self-custody)
- Budget planning: Determine how much to stake and keep for fees
Required Tools & Accounts
- Software wallet (MetaMask, Phantom, Keplr) — free. Stores and manages your crypto for day-to-day staking operations.
- Hardware wallet (Ledger, Trezor) — £50-200. Provides secure offline storage for larger amounts.
- Exchange account (Binance, Coinbase, OKX) — free to open, fees apply per transaction. The easiest route for beginners.
- DeFi platform (Lido, Rocket Pool) — free to access, protocol fees apply. Offers tokenised staking with maintained liquidity.
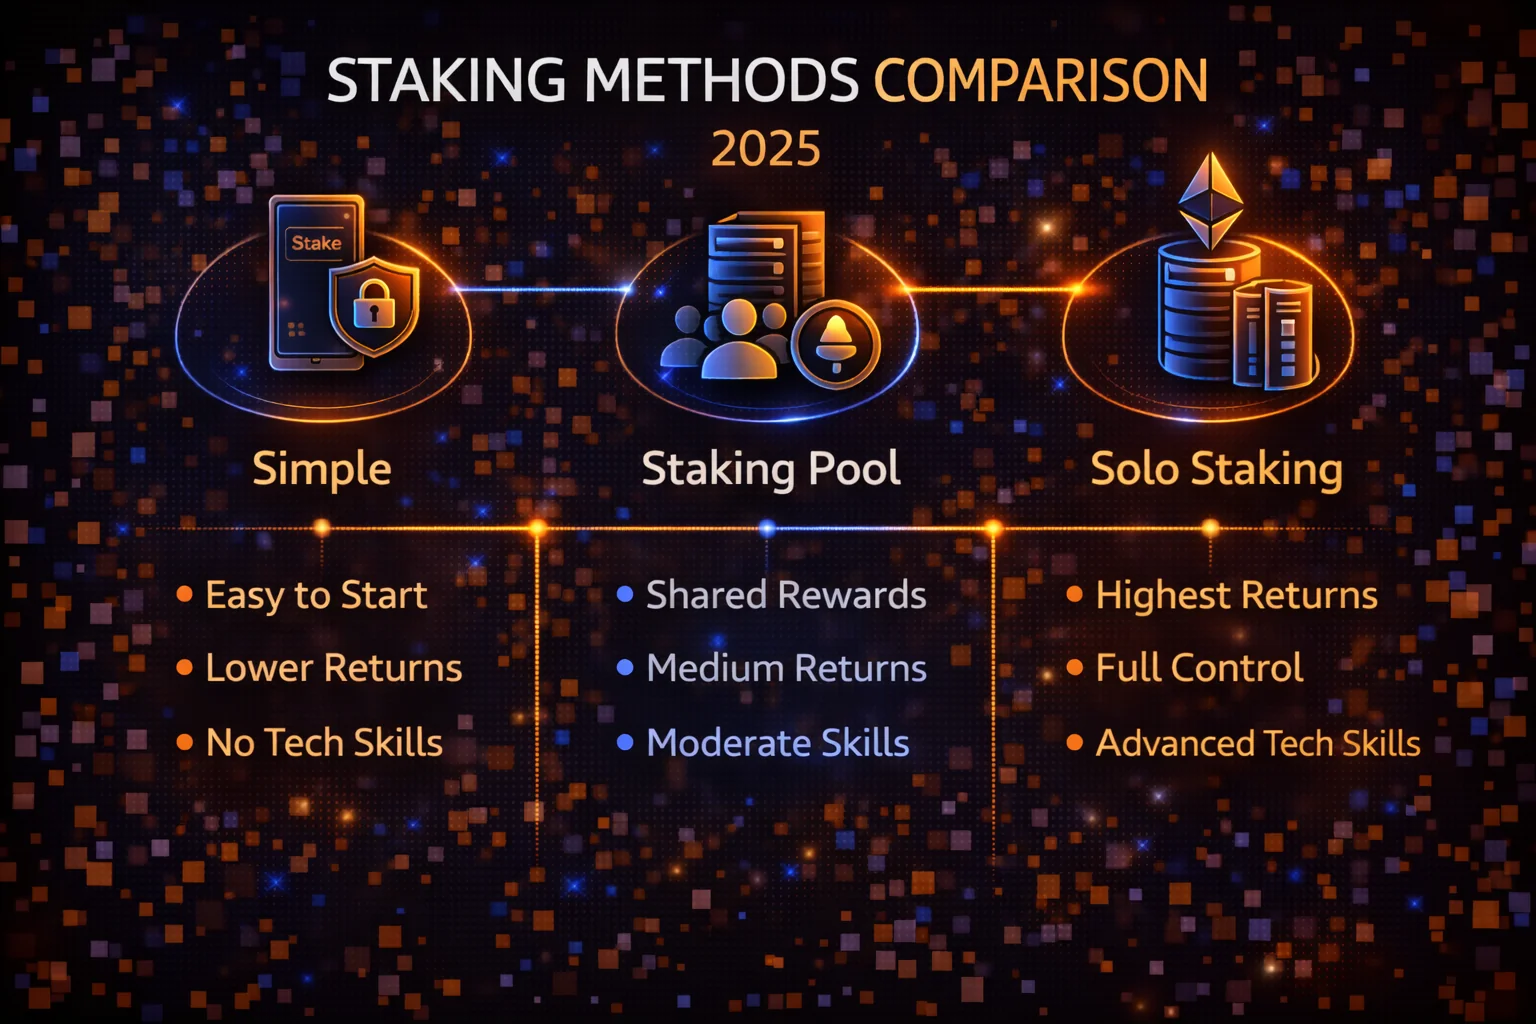
Staking Methods Comparison
1. Exchange (CEX) Staking
Stake directly on centralised exchanges like Binance, Gemini, or OKX.
Best For:
- Complete beginners to crypto staking
- Users who prioritise convenience over control
- Small amounts (under $1,000)
- Those who want customer support
Pros & Cons
Pros: one-click staking, no minimum amounts, automatic compounding, and customer support if anything goes wrong.
Cons: you surrender control of your private keys, face platform risk (hacks, bankruptcy), receive lower yields due to exchange fees, and must complete KYC verification.
2. Liquid Staking Protocols
Use protocols like Lido or Rocket Pool to stake while maintaining liquidity through derivative tokens.
Best For:
- DeFi users who want to use staked assets elsewhere
- Those seeking flexibility without lockups
- Users comfortable with smart contract risks
- Capital efficiency maximisers
3. Native/Delegated Staking
Stake directly through network interfaces or run your own validator node.
Best For:
- Users who want maximum control and rewards
- Those supporting network decentralisation
- Large stakeholders (>$10,000)
- Technical users comfortable with self-custody
Method Selection Framework
| Your Profile | Recommended Method | Reason |
|---|---|---|
| Complete beginner, $500 | Exchange staking | Simplest, lowest risk to start |
| DeFi user, wants flexibility | Tokenized staking | Can use staked tokens in other protocols |
| Large holder, values control | Native staking | Maximum rewards, full custody |
| Moderate experience, $1K-10K | Mix of liquid + exchange | Diversification across methods |
Wallet Setup Guide
Software Wallet Setup
- Download official wallet: Only use official websites or app stores
- Create new wallet: Generate a new seed phrase (don't import existing)
- Secure seed phrase: Write down all 12-24 words in correct order
- Verify backup: Test recovery process with seed phrase
- Add networks: Configure for your target blockchain (Ethereum, Solana, etc.)
- Fund wallet: Transfer crypto and keep some for gas fees
Hardware Wallet Integration
For amounts over $1,000, consider using a hardware wallet:
- Purchase from manufacturer: Buy directly from Ledger or Trezor
- Initialise device: Set up PIN and generate seed phrase
- Install apps: Add blockchain apps (Ethereum, Solana, etc.)
- Connect to interface: Link to MetaMask or native wallet software
- Test small transaction: Verify everything works before large transfers
Network Configuration
Ensure your wallet is configured for the correct networks:
- Ethereum: Mainnet (Chain ID: 1)
- Solana: Mainnet Beta
- Cardano: Mainnet
- Cosmos: Cosmoshub-4
- Polkadot: Polkadot Mainnet
Advanced Staking Strategies
Multi-Chain Staking Portfolio
Diversify across different blockchain networks to maximise returns and reduce risk:
| Network | Typical APY | Unbonding Period | Best For |
|---|---|---|---|
| Ethereum 2.0 | 4-6% | Variable (withdrawals enabled) | Long-term holders, DeFi integration |
| Solana | 6-8% | 2-3 days | Active traders, moderate risk tolerance |
| Cardano | 4-5% | No lockup | Beginners, flexibility seekers |
| Cosmos | 8-12% | 21 days | Higher yield seekers, governance participation |
| Polkadot | 10-14% | 28 days | Long-term investors, parachain supporters |
Yield optimisation Techniques
- Compound Timing: Reinvest rewards when gas fees are low and yields are high
- Validator Rotation: Monitor performance and switch to better validators quarterly
- Tokenized Staking Arbitrage: Trade liquid staking tokens when they trade at discounts
- Cross-Chain Opportunities: Move assets to chains with temporarily higher yields
- Governance Participation: Vote in governance proposals to earn additional rewards
Tax-Efficient Staking
Strategies to minimise tax burden:
- Jurisdiction Shopping: Consider staking through entities in crypto-friendly jurisdictions
- Reward Timing: Time reward claims to optimise tax year implications
- Loss Harvesting: realise losses on other investments to offset staking income
- Long-term Holding: Hold staked tokens for over a year to qualify for capital gains treatment
- Record Keeping: Maintain detailed records of all staking activities and rewards
Institutional Staking Approaches
For larger stakeholders ($100K+):
- Direct Validation: Run your own validator nodes for maximum control and rewards
- Staking-as-a-Service: Use professional services like Figment, Blockdaemon, or Coinbase Cloud
- Multi-Signature Setup: Use multisig wallets for enhanced security
- Insurance Coverage: Obtain slashing insurance through providers like Nexus Mutual
- Compliance Framework: Implement proper compliance and reporting procedures
Detailed Step-by-Step Instructions
Method A: Exchange Staking
Binance Staking Example:
- Create account: Sign up at Binance and complete KYC verification
- Deposit crypto: Transfer your tokens to Binance or buy directly
- Navigate to Earn: Go to "Earn" → "Staking" in the main menu
- Select asset: Choose your cryptocurrency (ETH, ADA, SOL, etc.)
- Choose product: Pick between flexible (unstake anytime) or locked (higher APY)
- Enter amount: Specify how much to stake
- Confirm staking: Review terms and confirm the transaction
- Monitor rewards: Check "Earn History" for daily reward accruals
Coinbase Staking Example:
- Account setup: Create Coinbase account with full verification
- Buy or deposit: Acquire stakeable crypto in your account
- Access staking: Go to your asset and click "Stake" button
- Review terms: Understand the 25% fee and unbonding periods
- Start staking: Confirm the amount and begin earning
- Track performance: Monitor in your portfolio dashboard
Method B: Liquid Staking
Lido Ethereum Staking:
- Visit Lido: Go to stake.lido.fi (verify URL carefully)
- Connect wallet: Click "Connect wallet" and select MetaMask
- Enter amount: Specify ETH amount to stake (minimum 0.01 ETH)
- Review transaction: Check gas fees and exchange rate
- Confirm staking: Approve transaction in MetaMask
- Receive stETH: Get tokenised staking tokens in your wallet
- Track rewards: stETH balance increases daily with rewards
- Optional DeFi use: Use stETH in other protocols (additional risk)
Rocket Pool Staking:
- Access platform: Visit stake.rocketpool.net
- Connect wallet: Link your Ethereum wallet
- Stake ETH: Exchange ETH for rETH tokens
- Hold rETH: Token appreciates in value relative to ETH
- Unstake when ready: Exchange rETH back to ETH
Method C: Native Staking
Ethereum Solo Staking (Advanced):
- Hardware setup: Prepare dedicated computer or VPS
- Install clients: Set up execution and consensus layer clients
- Generate keys: Create validator keys securely
- Deposit 32 ETH: Send to Ethereum deposit contract
- Activate validator: Wait for activation queue
- Monitor uptime: Ensure 99%+ uptime to avoid penalties
Solana Delegated Staking:
- Choose validator: Research performance and commission rates
- Use Phantom wallet: Connect to Solana network
- Access staking: Go to "Stake" section in wallet
- Select validator: Choose from list of active validators
- Delegate SOL: Specify amount and confirm transaction
- Wait for activation: Staking becomes active next epoch
- Claim rewards: Rewards auto-compound or can be withdrawn
Cardano Staking:
- Download Yoroi/Daedalus: Official Cardano wallets
- Transfer ADA: Send ADA to your wallet
- Choose stake pool: Research pools by performance and fees
- Delegate stake: Select pool and confirm delegation
- Wait for rewards: Rewards start after 2-3 epochs (10-15 days)
- Compound or withdraw: Rewards are automatically added to stake
Security Best Practices
Wallet Security
- Seed phrase protection: Write on paper, store in multiple secure locations
- Never share online: No screenshots, cloud storage, or digital copies
- Use hardware wallets: For amounts over $1,000
- Enable 2FA: Use authenticator apps, not SMS
- Regular updates: Keep wallet software current
Transaction Security
- Verify addresses: Always double-check recipient addresses
- Check network: Ensure you're on the correct blockchain
- Start small: Test with small amounts first
- Monitor gas fees: Avoid overpaying during network congestion
- Use official interfaces: Only interact with verified platforms
Platform Security
- Research thoroughly: Check platform history and audits
- Diversify stakes: Don't put everything with one validator/platform
- Monitor regularly: Check rewards and validator performance
- Stay informed: Follow platform updates and security notices
- Have exit strategy: Understand unstaking procedures
Red Flags to Avoid
- Platforms promising unrealistic returns (>50% APY)
- Requests for seed phrases or private keys
- Unaudited smart contracts or new protocols
- Validators with 0% commission (unsustainable)
- Platforms without clear team or documentation
Common Issues & Solutions
Transaction Problems
| Issue | Cause | Solution | Prevention |
|---|---|---|---|
| Transaction failed | Insufficient gas fees | Increase gas limit or wait for lower network congestion | Check gas tracker websites before transacting |
| Tokens not showing | Wrong network selected | Switch to correct network in wallet | Always verify network before sending |
| Can't connect wallet | Browser compatibility | Try different browser or clear cache | Use recommended browsers (Chrome, Firefox) |
| Staking not active | Waiting for epoch/activation | Wait for next epoch (varies by network) | Research activation times before staking |
| Slippage too high | Low liquidity or large trade | Reduce trade size or increase slippage tolerance | Check liquidity before large transactions |
Reward Issues
Detailed Troubleshooting Steps:
- No rewards showing:
- Check if there's a delay period (common with new stakes)
- Verify you're looking at the correct wallet address
- Confirm the validator is active and not jailed
- Check if rewards are auto-compounded vs. claimable
- Lower than expected rewards:
- Verify validator performance and commission rates
- Check if the network had downtime or issues
- Confirm your stake is fully activated
- Compare with network average APY
- Rewards stopped:
- Check if validator is still active and performing well
- Verify validator hasn't been slashed or jailed
- Confirm your delegation is still active
- Check for network upgrades or maintenance
- Can't claim rewards:
- Ensure you have enough tokens for gas fees
- Check if there's a minimum claim amount
- Verify the claiming process for your platform
- Try during off-peak hours for lower fees
Unstaking Problems
Network-Specific Unbonding Periods:
| Network | Unbonding Period | Partial Unstaking | Notes |
|---|---|---|---|
| Ethereum | Variable queue | Yes | Withdrawals enabled since Shanghai upgrade |
| Solana | 2-3 days | Yes | Deactivation happens at epoch boundaries |
| Cardano | No lockup | Yes | Can redelegate immediately |
| Cosmos | 21 days | Yes | No rewards during unbonding |
| Polkadot | 28 days | Yes | Can nominate up to 16 validators |
Emergency Unstaking Strategies:
- Tokenized staking tokens: Trade stETH, rETH for immediate liquidity (may incur a discount)
- Borrowing against stake: Use staked tokens as collateral for loans
- Partial unstaking: Unstake only what you need, keep rest earning
- Cross-chain bridges: Move to chains with shorter unbonding periods
Security Incident Response
If you suspect a security breach:
- Immediate actions:
- Disconnect wallet from all DApps
- Move remaining funds to a new wallet
- Revoke all token approvals
- Change all related passwords
- Assessment:
- Check transaction history for unauthorised activity
- Identify potential attack vectors
- Document all suspicious transactions
- Contact platform support if applicable
- Recovery:
- Create new wallet with fresh seed phrase
- Implement stronger security measures
- Consider hardware wallet upgrade
- Report incident to relevant authorities if significant
Performance optimisation
maximising staking efficiency:
- Validator monitoring: Use tools like Beaconcha.in, Mintscan, or Subscan
- Reward tracking: Monitor APY changes and adjust strategies accordingly
- Gas optimisation: Time transactions during low-fee periods
- Compounding frequency: Calculate optimal reinvestment intervals
- Portfolio rebalancing: Adjust allocations based on performance
Monitoring & optimisation
Essential Metrics to Track
| Metric | Description | Target Range | Action Threshold |
|---|---|---|---|
| Validator Uptime | Percentage of time validator is online | >99% | Switch if 95% for 1 week |
| Commission Rate | Validator's fee percentage | 5-10% | Review if 15% or sudden increases |
| Actual vs Expected APY | Real returns vs network average | Within 1% of network avg | Investigate if >2% below average |
| Slashing Events | Penalties for validator misbehavior | 0 | Immediate action on any slashing |
| Delegation Changes | Stake flowing to/from validator | Stable or growing | Investigate if large outflows |
Automated Monitoring Setup
- Portfolio Tracking:
- Use CoinTracker, Koinly, or Blockfolio for overall portfolio
- Set up alerts for significant balance changes
- Track rewards accumulation and compound timing
- Validator Monitoring:
- Subscribe to validator notifications on block explorers
- Join validator Discord/Telegram channels
- Set up uptime alerts through monitoring services
- Market Monitoring:
- Track staking reward rates across networks
- Monitor tokenised staking token premiums/discounts
- Set price alerts for rebalancing opportunities
optimisation Strategies
Quarterly Review Process:
- Performance Analysis:
- Calculate actual returns vs. expectations
- Compare performance across different validators/platforms
- Assess risk-adjusted returns
- Validator Assessment:
- Review uptime and performance metrics
- Check for any governance participation
- Evaluate commission rate competitiveness
- Strategy Adjustment:
- Rebalance between different networks
- Adjust liquid vs. native staking allocation
- Consider new opportunities and platforms
Compound optimisation:
Calculate optimal compounding frequency:
- High gas networks (Ethereum): Compound monthly or when rewards >$100
- Low gas networks (Solana, Cardano): Compound weekly or bi-weekly
- Auto-compounding platforms: Let platform handle optimisation
- Tax considerations: Time compounding to optimise tax implications
Risk Management Framework
Diversification Guidelines:
- Network diversification: No more than 50% in any single network
- Validator diversification: Use 3-5 validators per network
- Platform diversification: Split between CEX, DeFi, and native staking
- Geographic diversification: Consider validator geographic distribution
Emergency Procedures:
- Validator Issues:
- Have backup validators researched and ready
- Know the redelegation process for each network
- Maintain emergency fund for gas fees
- Platform Issues:
- Keep alternative platforms configured
- Maintain multiple wallet access methods
- Have customer support contacts ready
- Market Stress:
- Understand liquidation risks if using leverage
- Have exit strategies for different scenarios
- Maintain adequate cash reserves
Recommended Platforms & Tools
centralised Exchanges
- Binance Earn - Largest selection of stakeable assets
- Bybit - Best for US users, regulated
- OKX - Competitive rates, global access
- Kraken - Strong security record
Liquid Staking Protocols
- Lido - Largest liquid staking protocol (external, no referral partner)
- Rocket Pool - Decentralised Ethereum staking
- Marinade - Solana tokenised staking
- Ankr - Multi-chain tokenised staking
Wallets & Tools
- MetaMask: Most popular Ethereum wallet
- Phantom: Leading Solana wallet
- Keplr: Cosmos ecosystem wallet
- Yoroi/Daedalus: Official Cardano wallets
- Ledger - Hardware wallet for security
Monitoring & Analytics
- Beaconcha.in: Ethereum validator monitoring
- Staking Rewards: Cross-chain staking data
- DefiLlama: DeFi and liquid staking analytics
- Messari: Comprehensive crypto data
Advanced Staking Economics and Market Analysis
Understanding Staking Yield Dynamics
Staking yields fluctuate based on multiple economic factors including network participation rates, inflation schedules, and validator competition. Networks typically implement dynamic reward mechanisms where higher participation reduces individual yields but increases network security. Understanding these economic principles helps stakers make informed decisions about timing and allocation strategies.
Inflation-based reward systems create interesting dynamics where early stakers benefit from higher yields before widespread adoption. Ethereum's post-merge economics demonstrate how transaction fee burning can create deflationary pressure, potentially increasing the real value of staking rewards beyond nominal APY calculations. Professional stakers monitor these macroeconomic factors to optimise their positioning.
Validator Economics and Commission Structures
Validator commission rates significantly impact staking returns, with optimal rates typically ranging between 5-10% for most networks. Zero-commission validators often prove unsustainable long-term, while excessive fees reduce delegator returns. Successful validators balance competitive rates with operational sustainability, investing commission income into infrastructure improvements and security enhancements.
Professional validators implement tiered commission structures, offering reduced rates for larger delegations or long-term commitments. Understanding validator business models helps stakers identify reliable partners who prioritise network security and delegator satisfaction over short-term profit maximisation. Quality validators often provide additional services like governance participation and educational resources.
Network Security Economics
Staking participation rates directly correlate with network security, creating economic incentives for widespread participation. Networks with higher staking ratios generally offer better security guarantees but may provide lower individual yields due to increased competition. The optimal staking ratio balances security requirements with economic incentives for validators and delegators.
Slashing mechanisms create economic penalties for validator misbehavior, protecting network integrity while creating risks for stakers. Understanding slashing conditions and their economic impact helps stakers evaluate validator quality and implement appropriate risk management strategies. Insurance products and slashing protection mechanisms are emerging to address these concerns.
Cross-Chain Yield Arbitrage
Yield differences between networks create arbitrage opportunities for sophisticated stakers willing to manage multi-chain positions. However, these opportunities must account for bridging costs, technical risks, and time delays associated with cross-chain operations. Professional arbitrageurs develop systematic approaches to identify and capture yield differentials while managing associated risks.
Liquid staking tokens enable more efficient cross-chain strategies by providing immediate liquidity for position adjustments. Stakers can bridge liquid staking tokens to high-yield networks while maintaining exposure to underlying staking rewards. This approach requires understanding of bridge security, token economics, and potential depegging risks.
Institutional Staking Strategies and Professional Management
Enterprise Staking Infrastructure
Institutional staking operations require sophisticated infrastructure including redundant hardware, professional custody solutions, and comprehensive monitoring systems. Enterprise validators typically operate across multiple geographic locations with backup systems ensuring continuous operation even during infrastructure failures or natural disasters.
Professional staking services offer white-label solutions for institutions seeking staking exposure without operational complexity. These services provide institutional-grade security, compliance reporting, and risk management while maintaining the benefits of direct staking participation. Custody integration ensures institutional assets remain secure while earning staking rewards.
Regulatory Compliance and Reporting
Institutional staking must comply with various regulatory requirements including anti-money laundering (AML) procedures, know-your-customer (KYC) verification, and financial reporting standards. Professional staking services implement comprehensive compliance frameworks that meet institutional requirements while maintaining operational efficiency.
Tax reporting for institutional staking involves complex calculations including reward valuation, cost basis tracking, and jurisdiction-specific treatment of staking income. Automated reporting systems help institutions maintain accurate records while ensuring compliance with evolving regulatory requirements across multiple jurisdictions.
Risk Management Frameworks
Institutional risk management for staking includes comprehensive assessment of technical risks, market risks, and operational risks. Professional frameworks implement position limits, diversification requirements, and stress testing procedures that ensure staking activities align with institutional risk tolerance and investment mandates.
Insurance coverage for institutional staking includes slashing protection, custody insurance, and operational risk coverage. Professional insurance products are evolving to address the unique risks associated with proof-of-stake participation while providing institutional-quality protection for large-scale staking operations.
Future Staking Innovations and Emerging Trends
Liquid Staking Evolution
Liquid staking protocols continue evolving with innovations including distributed validator technology (DVT), which reduces centralisation risks by distributing validator operations across multiple parties. These advances improve security and decentralisation while maintaining the liquidity benefits that make liquid staking attractive to users.
Cross-chain liquid staking enables users to stake assets on one network while using derivative tokens on another, expanding utility and yield opportunities. Emerging protocols are developing seamless cross-chain experiences that abstract away technical complexity while providing sophisticated users with advanced features and customisation options.
Automated Staking Strategies
Artificial intelligence and machine learning are being integrated into staking platforms to optimise validator selection, timing decisions, and risk management. Automated systems can monitor validator performance, adjust allocations based on changing conditions, and implement sophisticated strategies that would be difficult for individual users to execute manually.
Smart contract automation enables complex staking strategies including automatic compounding, dynamic rebalancing, and conditional execution based on market conditions. These innovations make sophisticated staking strategies accessible to retail users while providing institutional users with powerful tools for portfolio optimisation.
Integration with Traditional Finance
Staking is increasingly integrated with traditional financial products including ETFs, structured products, and institutional investment vehicles. These integrations provide traditional investors with exposure to staking yields while maintaining familiar investment structures and regulatory frameworks.
Central bank digital currencies (CBDCs) may incorporate staking mechanisms, potentially creating new opportunities for yield generation within government-backed digital currencies. Understanding these developments helps stakers position themselves for emerging opportunities in the evolving digital finance landscape.
Advanced Staking Strategies and Professional Techniques
Institutional Staking Infrastructure and Compliance
Enterprise staking operations require comprehensive infrastructure solutions that address regulatory compliance, fiduciary responsibilities, and operational risk management while accessing institutional-grade staking services. Professional implementation includes establishing governance frameworks, implementing audit trails, and developing risk management protocols that meet institutional standards for cryptocurrency asset management.
Institutional staking infrastructure includes dedicated validator nodes, professional custody solutions, and comprehensive reporting systems that enable traditional financial institutions to participate in proof-of-stake networks while maintaining regulatory compliance and operational excellence standards required for fiduciary asset management and institutional cryptocurrency operations.
Staking Derivatives and Liquidity Management
Advanced staking participants utilise liquid staking derivatives to maintain portfolio flexibility whilstearning staking rewards, enabling participation in additional DeFi opportunities without sacrificing staking income. Liquid staking tokens represent staked positions that can be traded, used as collateral, or deployed in yield farming strategies that compound returns beyond basic staking rewards.
Professional liquidity management includes understanding derivative pricing mechanisms, evaluating counterparty risks associated with liquid staking protocols, and implementing hedging strategies that protect against smart contract risks while maintaining exposure to staking rewards and potential token appreciation across multiple blockchain networks.
Tax optimisation and Regulatory Considerations
Cryptocurrency staking creates complex tax implications that vary significantly across jurisdictions, requiring professional tax planning and compliance strategies that optimise after-tax returns while maintaining regulatory compliance. Advanced tax planning includes understanding the treatment of staking rewards, implementing tax-efficient harvesting strategies, and maintaining comprehensive records that support accurate reporting.
Professional tax optimisation includes timing of reward realisation, utilisation of tax-advantaged structures where available, and sophisticated planning that minimises tax burden while maintaining compliance with evolving cryptocurrency regulations. International staking operations require additional consideration of cross-border tax implications and regulatory requirements that affect overall strategy implementation.
Risk Management and Security Protocols
Professional staking operations implement comprehensive security protocols that protect against validator slashing, key compromise, and operational failures that could result in loss of staked assets. Advanced security measures include hardware security modules, multi-signature configurations, and geographic distribution of infrastructure that ensures operational continuity under various threat scenarios.
Risk management frameworks include continuous monitoring of validator performance, implementation of automated alerting systems, and development of contingency plans that address various failure modes and market scenarios. Professional staking operations maintain insurance coverage, emergency procedures, and comprehensive backup systems that protect against operational risks while maintaining optimal staking performance.
Emerging Staking Technologies and Future Developments
The cryptocurrency staking landscape continues evolving with innovative consensus mechanisms, enhanced security features, and improved user experiences that expand staking opportunities across new blockchain networks. Emerging technologies include liquid staking innovations, cross-chain staking protocols, and automated staking services that simplify participation while maintaining security and decentralisation principles.
Future staking developments include integration with traditional finance infrastructure, development of institutional-grade staking services, and implementation of advanced governance mechanisms that enhance network security while providing additional rewards for active participants. These innovations expand staking accessibility while maintaining the fundamental security and decentralisation benefits that make proof-of-stake networks attractive for long-term cryptocurrency investment strategies.
Global Staking Market Analysis and Competitive Landscape
The global cryptocurrency staking market continues expanding with increasing institutional adoption, regulatory clarity, and technological innovation that drives mainstream acceptance of proof-of-stake networks. Market analysis reveals growing competition amongst staking service providers, increasing sophistication of staking infrastructure, and expanding opportunities for both retail and institutional participants in the staking ecosystem.
Competitive dynamics include platform differentiation through user experience, security features, and yield optimisation capabilities that attract users seeking reliable staking services. Professional market participants evaluate platforms based on security track records, yield consistency, and additional features that enhance the overall staking experience while maintaining appropriate risk management standards.
Staking Education and Community Development
Successful cryptocurrency staking requires comprehensive education about network mechanics, validator selection, and risk management techniques that can be developed through community engagement, educational resources, and practical experience with different staking protocols. Educational initiatives include detailed guides, video tutorials, and community forums that help users understand complex staking concepts and implement effective strategies.
Community development includes participation in network governance, contribution to protocol improvement proposals, and sharing knowledge with other stakers to improve the overall ecosystem. Advanced stakers often become validators themselves, contributing directly to network security whilstearning additional rewards through block production and transaction validation activities that support blockchain network operations.
Staking Performance optimisation and Continuous Improvement
maximising staking returns requires continuous optimisation of validator selection, monitoring of network performance, and adaptation to changing market conditions that affect staking profitability and risk exposure. Performance optimisation includes analysing validator uptime statistics, understanding commission structures, and implementing systematic approaches to validator evaluation and selection that maximise long-term returns.
Continuous improvement strategies include regular portfolio rebalancing, monitoring of new staking opportunities, and staying informed about protocol upgrades that may affect staking mechanics and reward structures. Professional stakers implement comprehensive tracking systems that monitor performance across multiple networks, evaluate strategy effectiveness, and identify opportunities for optimisation that enhance overall portfolio performance while maintaining appropriate risk management standards for long-term wealth building through cryptocurrency staking activities and professional blockchain network participation that supports decentralised infrastructure development and network security enhancement through active validator participation and community governance engagement that contributes to the broader cryptocurrency ecosystem development and blockchain technology advancement for sustainable decentralised finance growth and institutional cryptocurrency adoption.
Advanced Staking Implementation and Professional Strategies
Institutional Staking Infrastructure and Professional Operations
Professional cryptocurrency staking requires sophisticated infrastructure, including redundant hardware systems, enterprise-grade security protocols, and comprehensive monitoring solutions that ensure optimal validator performance while maintaining institutional compliance standards. Advanced staking operations utilise dedicated server infrastructure with 99.9% uptime guarantees, multi-signature wallet configurations, and automated failover systems that protect against operational disruptions and maintain consistent reward generation.
Enterprise staking infrastructure includes geographically distributed validator nodes, professional custody solutions, and comprehensive audit trails that meet institutional requirements for fiduciary asset management. Professional operators implement advanced monitoring systems that track validator performance metrics, network conditions, and reward distribution patterns while maintaining detailed operational logs for compliance reporting and performance optimisation analysis.
Multi-Chain Staking Portfolio Construction and Risk Management
Strategic multi-chain staking involves systematic allocation across different proof-of-stake networks based on risk-adjusted return analysis, correlation patterns, and network fundamentals. Professional portfolio construction considers factors such as validator economics, slashing risk, network security assumptions, and regulatory environments when determining optimal allocation percentages across Ethereum, Solana, Cardano, Polkadot, and other major staking networks.
Advanced diversification strategies include correlation analysis between different networks, understanding how various consensus mechanisms respond to market stress, and implementing systematic rebalancing procedures that maintain target allocations while optimising for changing market conditions. Professional staking portfolios typically allocate 40-60% to Ethereum staking, 20-30% to alternative layer-1 networks, and 10-20% to emerging protocols, depending on risk tolerance and return objectives.
Liquid Staking Derivatives and DeFi Integration Strategies
Advanced liquid staking strategies utilise derivative tokens like stETH, rETH, and cbETH as building blocks for sophisticated DeFi strategies that compound staking rewards through additional yield opportunities. Professional implementations include using liquid staking tokens as collateral in lending protocols, providing liquidity to automated market makers, and participating in yield farming strategies that generate additional returns on top of base staking rewards.
Sophisticated liquid staking approaches involve analysing the risk-return profiles of different protocols, understanding smart contract risks, and implementing hedging strategies that protect against depegging events while maintaining exposure to staking yields. Professional practitioners monitor liquid staking token premiums and discounts, implement arbitrage strategies during market dislocations, and utilise advanced DeFi protocols that optimise returns while managing counterparty and smart contract risks.
Validator Selection and Performance optimisation
Professional validator selection involves comprehensive due diligence, including analysis of historical performance metrics, commission structures, infrastructure quality, and operational track records. Advanced selection criteria include evaluating validator uptime statistics, slashing history, geographic distribution, and governance participation, while considering factors such as commission rates, minimum delegation requirements, and validator responsiveness to network upgrades and community governance proposals.
Performance optimisation strategies include monitoring validator effectiveness metrics, analysing reward distribution patterns, and implementing systematic approaches to validator rotation based on performance benchmarks. Professional staking operations maintain relationships with multiple high-quality validators across different networks, implement automated monitoring systems that track validator performance in real-time, and utilise advanced analytics to optimise delegation strategies based on changing network conditions and validator performance patterns.
Advanced Security Protocols and Operational Excellence
Enterprise-grade staking security includes implementation of hardware security modules, multi-signature wallet configurations, and comprehensive key management procedures that protect against both technical failures and malicious attacks. Advanced security frameworks include cold storage solutions for long-term staking positions, hot wallet configurations optimised for operational efficiency, and comprehensive backup and recovery procedures that ensure business continuity under various failure scenarios.
Professional operational procedures include regular security audits, penetration testing, and comprehensive incident response plans that address potential security breaches, validator failures, and network disruptions. Advanced operators implement comprehensive monitoring systems that provide real-time alerts for security events, performance anomalies, and network conditions while maintaining detailed operational logs for compliance reporting and continuous improvement initiatives.
Regulatory Compliance and Professional Tax Management
Comprehensive staking tax management requires detailed tracking of reward receipts, validator performance, and timing of staking activities across multiple jurisdictions and networks. Professional tax strategies include understanding the treatment of staking rewards as income or capital appreciation, implementing systematic record-keeping procedures, and utilising specialised software that tracks staking activities across multiple protocols and provides comprehensive reporting for tax compliance.
Advanced tax optimisation includes strategic timing of staking activities, understanding jurisdiction-specific regulations, and implementing structures that optimise tax efficiency while maintaining compliance with evolving cryptocurrency regulations. Professional staking operations maintain comprehensive documentation of all staking activities, implement automated tracking systems that monitor reward distributions and validator performance, and work with qualified tax professionals who understand the complexities of cryptocurrency staking taxation and regulatory compliance requirements.
Conclusion
Cryptocurrency staking has matured into a sophisticated investment strategy. It offers multiple pathways to generate passive income. You also contribute to the security of the blockchain network. The evolution has been remarkable. It started with simple delegation. Now we have complex liquid staking derivatives and institutional-grade solutions. This demonstrates rapid innovation within the proof-of-stake ecosystem. Understanding these developments is crucial. It enables you to make informed decisions. You can choose staking approaches that align with your investment objectives, risk tolerance, and technical capabilities.
Success in staking requires understanding the economic fundamentals. You need to evaluate the quality and performance of the validator. Implement appropriate risk management strategies. The choice between exchange staking, liquid staking, and native validation depends on your circumstances. Consider your technical expertise, capital availability, and risk tolerance. Each approach offers distinct advantages and trade-offs. These must be carefully considered within your broader investment portfolio and long-term financial goals.
Professional staking services and institutional-grade solutions have emerged. These have expanded access to sophisticated strategies. Previously, only technical experts could use them. However, this accessibility comes with responsibility. You must understand the risks and mechanics underlying these services. This helps you make informed investment decisions. Professional staking requires ongoing monitoring. You need a performance evaluation and strategic adjustments. This maintains optimal returns whilst managing evolving risks in dynamic cryptocurrency markets.
Future developments in staking technology promise to address current limitations. They will expand opportunities for both retail and institutional participants. Innovations in liquid staking, cross-chain interoperability, and automated management systems are on the horizon. These will likely make staking more accessible and efficient. They maintain the security and decentralisation benefits. These make proof-of-stake networks valuable. Technological advances will continue expanding the toolkit. Cryptocurrency investors can use these to generate sustainable passive income through participation in the blockchain network.
The cryptocurrency ecosystem continues maturing. Staking will likely become increasingly important in diversified digital asset portfolios. The combination is compelling. You get yield generation, network participation, and technological innovation. This creates opportunities for long-term wealth building. Use cryptocurrency staking strategies that align with your investment objectives. Consider your risk management requirements. You contribute to the security and decentralisation of blockchain networks. These underpin the future of digital finance.
Sources & References
Frequently Asked Questions
- What do I need before staking crypto?
- You need a compatible wallet, the cryptocurrency you want to stake, native tokens for transaction fees, and access to a reputable staking platform or validator.
- How much ETH do I need to stake?
- Running a solo validator requires 32 ETH, but liquid staking platforms like Lido and exchanges allow you to stake any amount, even as little as 0.01 ETH.
- Can I unstake my crypto anytime?
- Most staking protocols have unbonding periods that range from hours to weeks. Liquid staking tokens can be traded immediately, but may trade at a discount to the underlying asset.
- Is crypto staking safe?
- Staking carries risks including slashing penalties, smart contract bugs, and token price volatility. Use reputable platforms, diversify your stakes, and never stake more than you can afford to lose.
- Do I need to pay taxes on staking rewards?
- In most jurisdictions, staking rewards are considered taxable income when received. Maintain detailed records of reward dates, amounts, and fair market values for tax reporting purposes.
- Should I compound my staking rewards?
- Compounding can increase long-term returns; however, consider the impact of transaction fees and tax implications. Many platforms offer automatic compounding to maximise efficiency.
- How do I choose a good validator?
- Look for validators with high uptime (>99%), reasonable commission rates (5-10%), a good community reputation, and responsive communication. Avoid 0% commission validators as they're often unsustainable.
- What's the minimum amount to start staking?
- This varies by method: exchanges often have no minimum, liquid staking protocols typically require 0.01–0.1 tokens, while native staking may require larger amounts (32 ETH for Ethereum validators).
← Back to Crypto Investing Blog Index
Financial Disclaimer
This content is not financial advice. All information provided is for educational purposes only. Cryptocurrency investments carry significant investment risk, and past performance does not guarantee future results. Always do your own research and consult a qualified financial advisor before making investment decisions.